Signal Trigger
The Signal trigger enables communication between multiple workflows. One workflow sends a signal, and another workflow receives it and starts automatically — no human intervention needed.
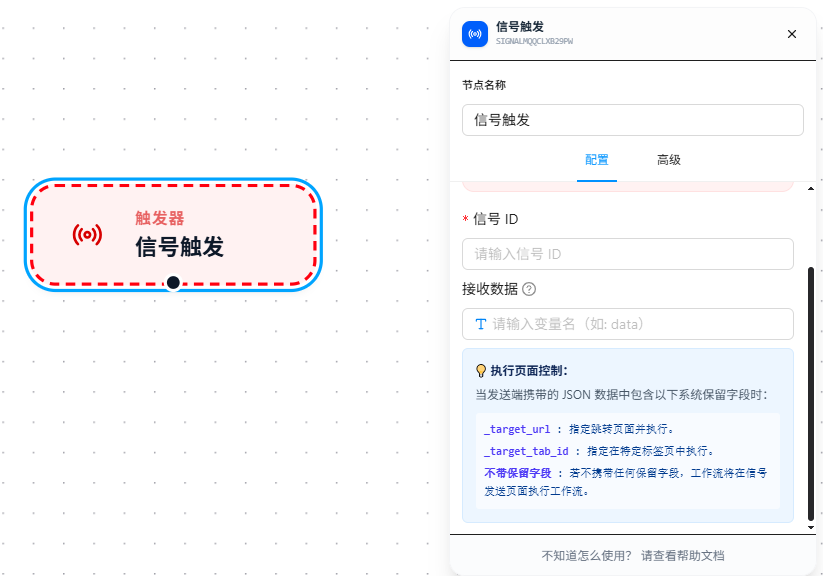
Core Concept
The Signal trigger is essentially one-to-many broadcast communication: the sender broadcasts a signal ID via the Send Signal node, and all Signal triggers listening for that ID will receive it and start. A single signal can wake up multiple workflows simultaneously.
Signals can carry data. Data attached by the sender is automatically JSON-parsed and, upon success, stored in the variable configured on the receiver side.
Configuration Steps
Take two workflows as an example — Workflow A sends a signal, Workflow B receives it and shows a notification.
Workflow A (Sender): Manual Execute → Send Signal
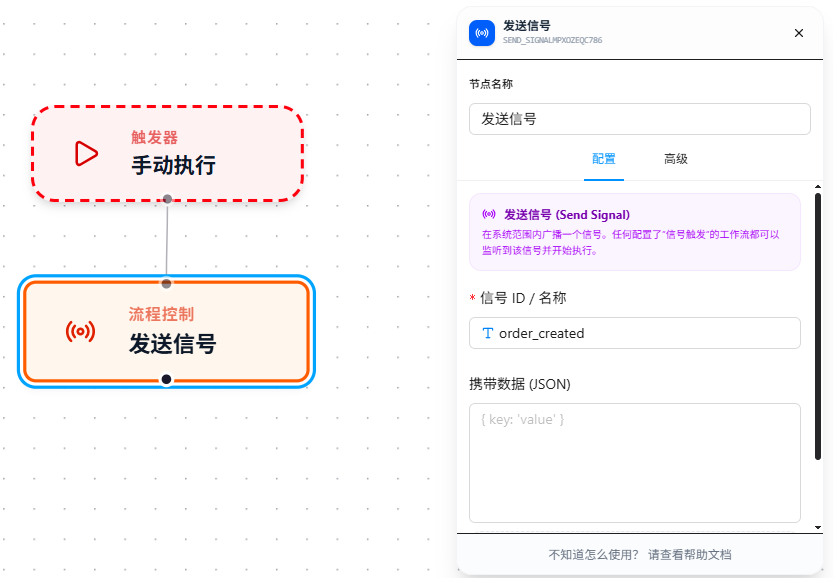
- Drag in Manual Execute as the entry point
- Drag in the Send Signal node
- Fill in a signal ID, e.g.,
order_updated
Workflow B (Receiver): Signal Trigger → Show Notification
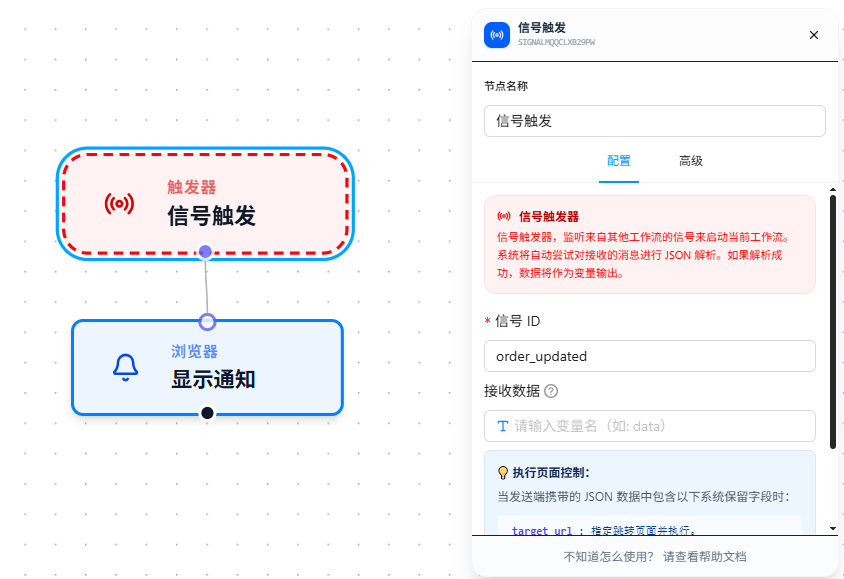
- Drag in the "Signal Trigger" node, set Signal ID to
order_updated(must match the sender exactly) - Set the variable name for received data (the execution page is controlled by system reserved fields in the signal — see below)
- Drag in the Show Notification node
- After saving, when Workflow A executes, Workflow B will automatically receive the signal and start
Execution Page Control
The Signal trigger's execution page is entirely determined by system reserved fields in the received signal data — the trigger itself no longer has a separate execution mode setting. The sender includes the following reserved fields in the signal JSON data to control which page the workflow executes on:
| Field | Description |
|---|---|
_target_url | Navigate to this URL and execute the workflow. |
_target_tab_id | Execute the workflow in a specified already-opened tab. |
| (No reserved fields) | When no reserved fields are included, the workflow executes on the signal sender's page. |
Priority: _target_tab_id > _target_url. If both are present, _target_tab_id is used.
// Example: sending a signal with _target_url
{
  "orderId": 12345,
  "_target_url": "https://example.com/orders/12345"
}
Parameter Reference
Signal ID
The unique identifier for the signal. Must match exactly between sender and receiver (case-sensitive). Use meaningful English names:
order_updated          → Order has been updated
data_sync_complete     → Data sync completed
crawl_finished         → Crawling finished
Receive Data
The variable name to store the sender's attached data after automatic JSON parsing. For example, if set to data, subsequent nodes can reference the received content using {{data}}.
If the sender doesn't include data, or the data isn't valid JSON, the variable value remains as-is (a string).
Activate Tab
When enabled, the browser automatically switches focus to the tab running the workflow when a signal is received. Suitable for scenarios where the user needs to see the operation results on the page; can be turned off for pure background data processing.
Use Cases
Signal trigger is ideal for multi-workflow orchestration scenarios:
- After a login workflow completes, send a signal — the data scraping workflow receives it and starts fetching data
- A scheduled inspection workflow detects an anomaly and sends a signal — the notification workflow receives it and pops up an alert
- A main workflow is split into multiple sub-workflows running in parallel, using signals to chain execution order
FAQ
Signal trigger keeps waiting and never starts
Symptom: The workflow never starts, and the log shows "waiting for signal."
Cause: The signal ID is spelled inconsistently (case-sensitive), or the sender workflow hasn't executed yet.
Solution: Check whether the signal IDs on the sender and receiver match exactly, including case. First trigger the sender manually using "Manual Execute" to confirm the signal is actually sent.